
If you are new to camping, going on an expedition, DofE, campsite hopping, travelling or something more extreme here is my ultimate guide to packing a rucksack. This will help you choose the right size rucksack for your gear, make informed choices on the kit you need to take clue you in on helpful additional accessories you can use and illustrate the correct order to pack items for weight distribution.
Why Is Packing a Rucksack Properly Important?
Weight Distribution: If carried incorrectly weight can cause back injuries and make carrying your pack difficult, if you pack your bag well not only will you save time, space and even weight you will also minimise the likely hood of a back injury and the pack will even be more comfortable to carry. Not everybody reading this will have ultra light high end equipment, and in some cases it’s not possible to pack ultra light for the situation you are heading into. For example though it might seem a great idea to pack an ultra light tent to save space , however if you are expecting high winds something very light and flimsy is not a great choice. Most people won’t own more than one tent – what you have will be your only choice so if it is a heavier tent packing it properly really matters. I personally always use an MSR Elixr 2, a backpacking tent that isn’t the heaviest or lightest it is really good for most situations and it packs down really well if done properly. If you are doing DofE or you are new to camping you probably wont have an expensive tent as you probably don’t know yet if you will continue in the outdoors, or you are just starting out . For you the tent may be quite heavy, so again it needs to be packed properly. Someone just starting out likely won’t spent a fortune on a sleeping bag either and cheaper bags almost always take up a lot more room usually most of the room in your bag!
Organisation: Packed properly you will know where everything in your rucksack is, saving you time when you need to find an item, cook and set up camp. This makes the whole experience far more enjoyable and gives you piece of mind. In some situations setting up a camp quickly can mean life or death if you are more of an extreme adventurer, so to know where everything is gives you some re assurance. For the majority however especially in the UK being slow and disorganised setting up camp because you haven’t packed well can often mean getting wet and miserable.
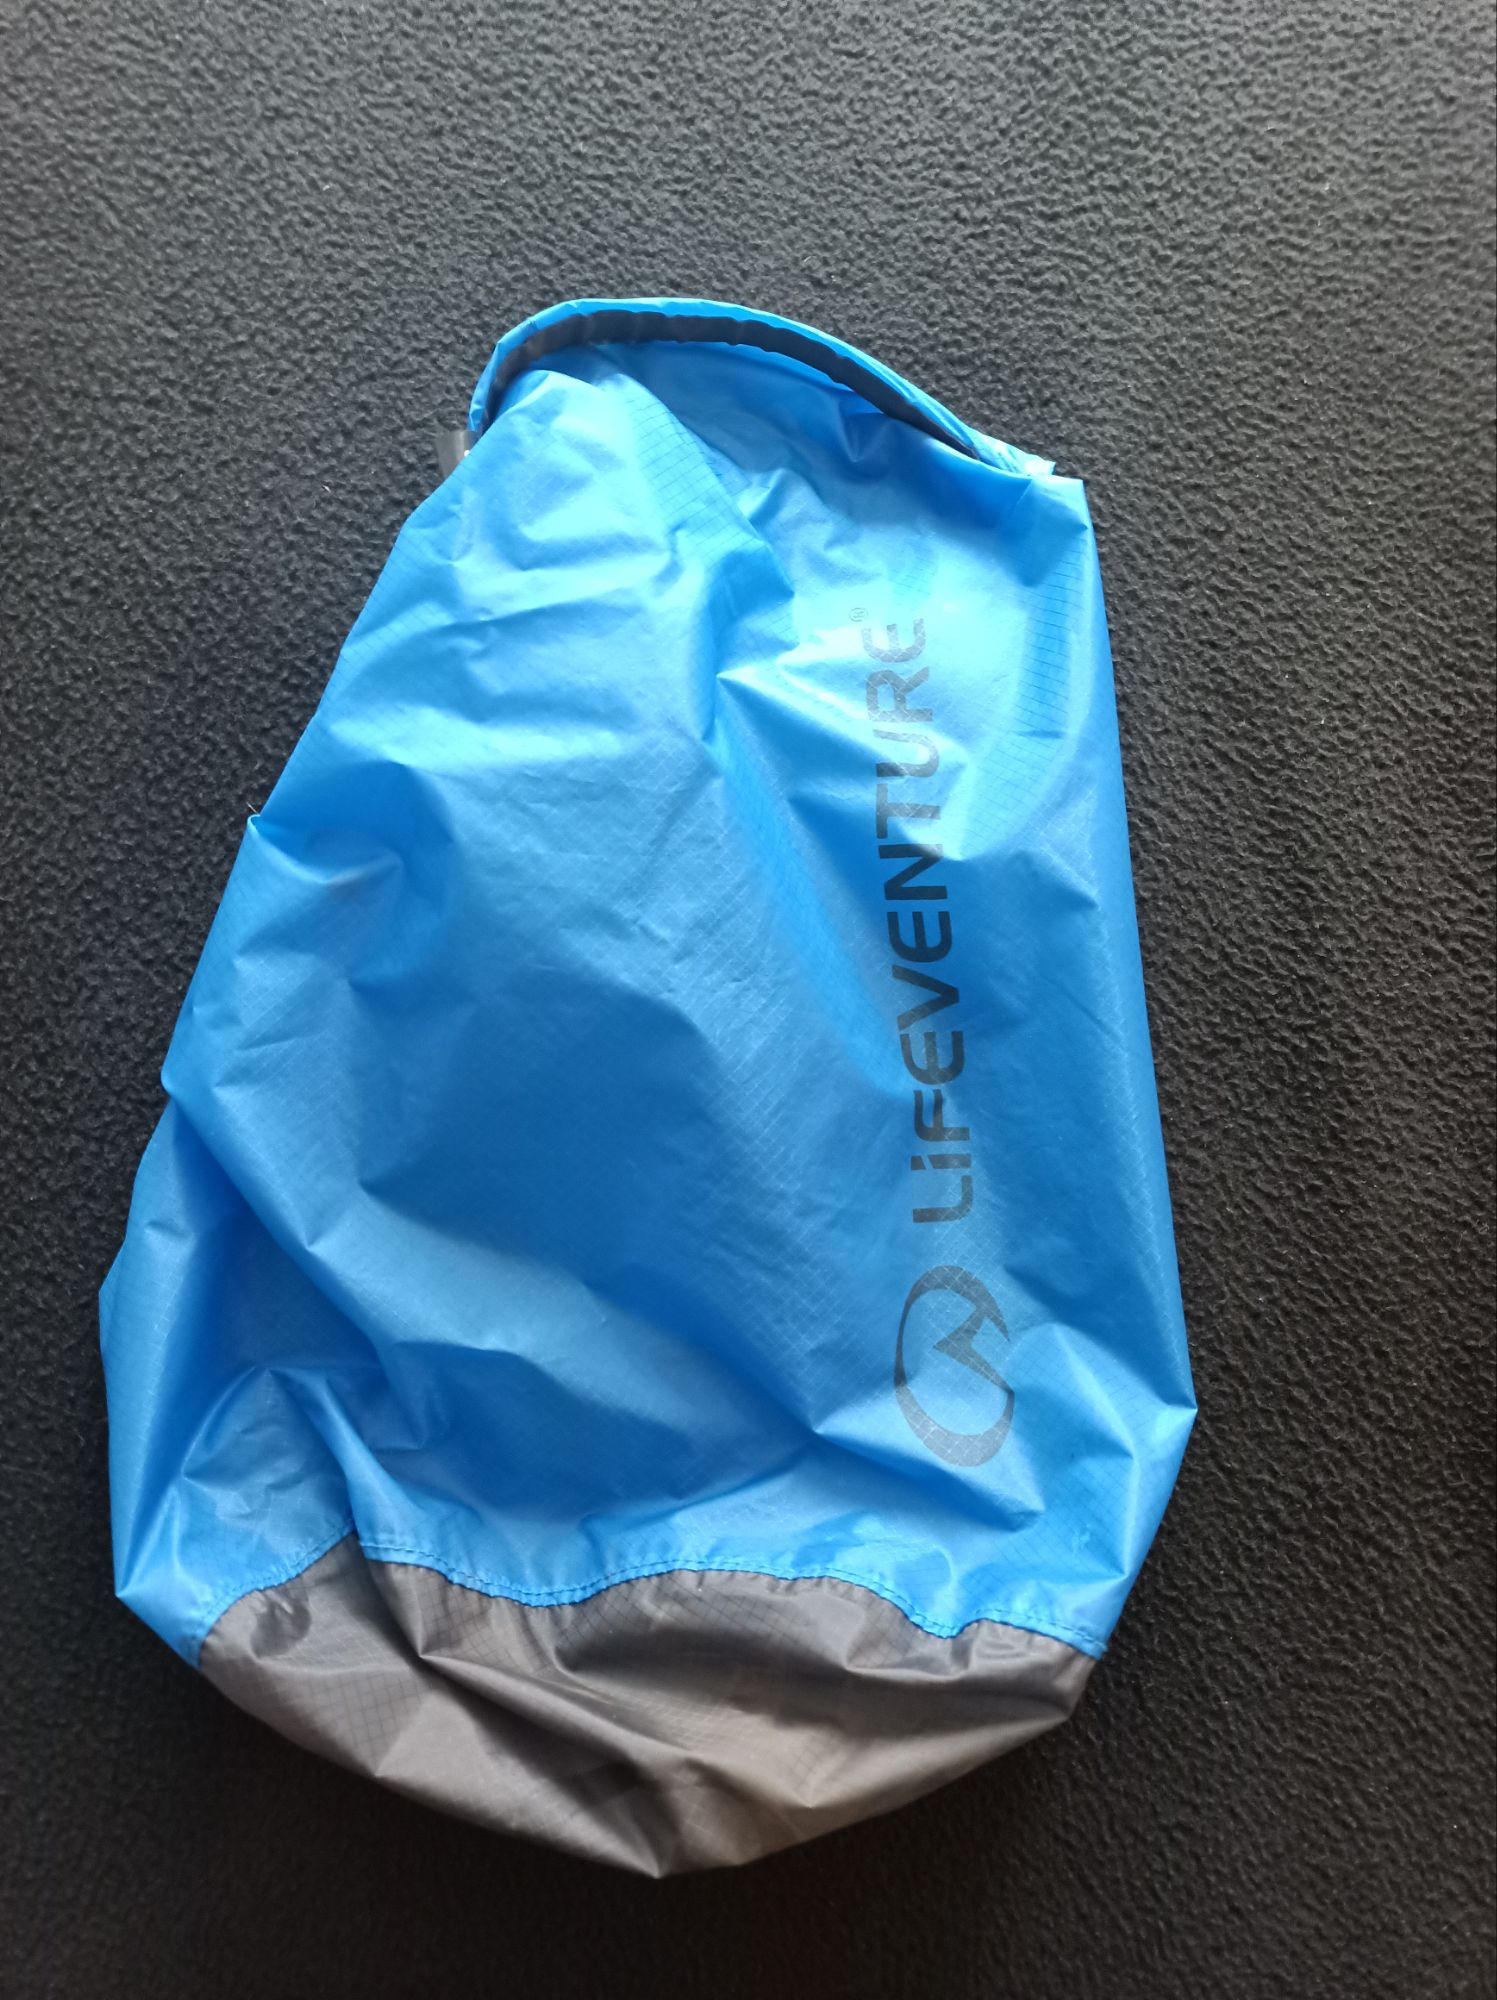
An Organisation Tip: Using compressible dry bags such as the Sea To Summit Evac is one of the best tips I can offer for packing a rucksack to squeeze down your clothes and sleeping bag in order to save rucksack space, and use other dry bags such as The Lifeventure Ultralight Dry Bag for non compressible kit. Not only will they keep the kit in them dry but they also enable you to easily organise the contents of your pack. Some you can get even have windows in them so you can see what they have in them such as the Sea To Summit Dry Bag View. You don’t have to use purely the brands I have mentioned as examples however, lots of brands make dry bags however the best performing and lightweight I have found are the ones made from Cordura fabric. Additionally they are much better at keeping the gear dry in your rucksack than using a rucksack cover, which restricts access to your bag. These covers can catch the wind while you are walking, slowing you down and making you unsteady on your feet, not to mention the potential to get caught on tree branches and other vegetation. Some bags come with the rain cover built in so if you have one of these, congratulations you are now a walking kite.


Choosing The Rucksack
This is a subject that I’ll go into much more detail in future articles for the purposes of this explainer however for this article lets keep it simple. You should ask yourself before a trip “Is the rucksack I’m taking the right size for the kit I have?’ If the answer to that is ‘no’ you may have to attach kit to the outside which is not ideal and this may sound fine but it’s could put you off balance when you walk. Another consideration is items outside of the rucksack are likely to get damaged, caught on objects and/or wet. The best choice is to get a bag you can get all of your gear inside of, so lets look at a few brief examples how rucksack sizes for different adventurers.
DofE and First Timers: In the likely event your gear isn’t so packable you may need anything from a 65 – 80l rucksack. A cheap sleeping bag for example can easily take up 20l of your bag along with sleeping bag and tent that is not going to leave you with much room for everything else.
Wild Campers: Realistically even if you have fairly decent gear you probably want to aim for around 50-65 upwards obviously the more you spend on lighter more packable gear and the more thought you put in, the smaller you can go with pack size.
Packing The Bag
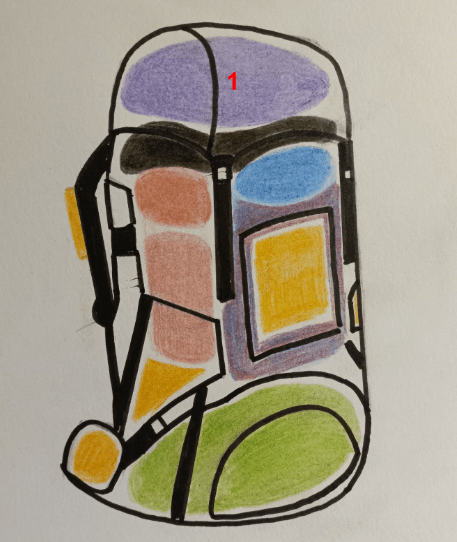
You should pack your rucksack in the order of what you are most likely to use and need to access and ensure you are carrying the weight efficiently, take a look at the images below which will illustrate how to pack your rucksack.
1: Light Items: The top of the rucksack is where you want to put your small items that you need at a moments notice, for me it would be a first aid kit here, headtorch, hat, gloves, sun cream and sunglasses.
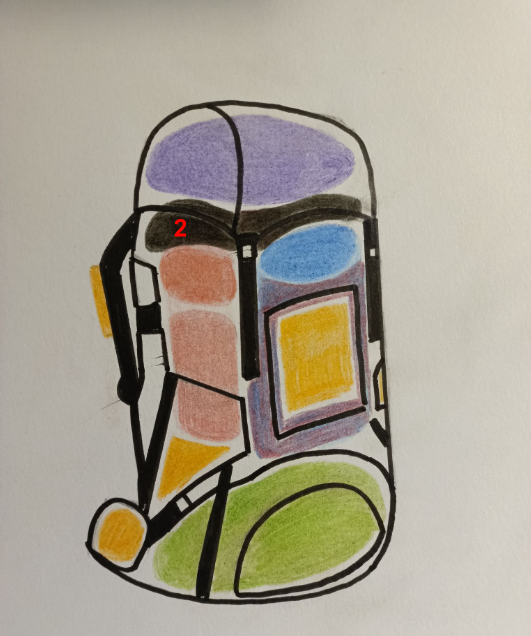
2: Waterproof jacket and trousers: Being the items on top, this way you can get at them in the shocking event that if you go hiking in the UK that it rains. I always put mine in a dry bag, yes they are waterproof but if it stops raining and I want to put them back in I’m not drenching the contents of my bag.
Top Tip: If you don’t take your waterproofs you can almost guarantee it’s going to rain and If you do it probably won’t. You don’t have to be pessimistic – just think of them as a good luck charm that might prevent rain (it won’t) take them even if it’s sunny and you will never be caught out.

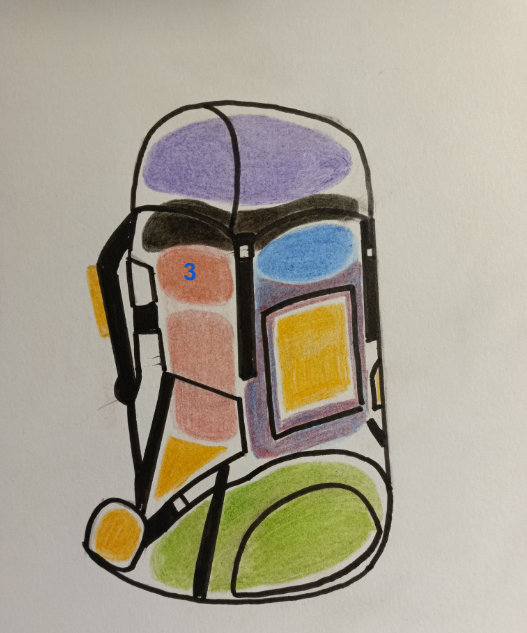
3. Cooking set in this area: If you have a decent compact gas cooking setup you should be able to easily store a small gas canister inside your cook kit. If you are doing DofE or you are a scout you may have a Trangia stove. This will be more of a challenge. I could go into different cooking systems here however that’s a subject that really needs it’s own guide so watch this space.
4. Food for main meals or spare snacks: Let’s talk about camping food and ration packs here, these come in two forms, dehydrated and wet. I find taking my own food much less disappointing and cheaper and I’m yet to try a camping meal out of a packet that I have enjoyed enough to finish even when I’ve really needed the calories. If there’s any manufacturers out there who are confident they have a product that actually tastes good I’m happy to do a blog on it and try it but I won’t hold my breath! If you do decide to take ration packs or camping food you should consider that wet food packs can be quite heavy especially if you are taking more than one meal with you. Alternatively dehydrated food packs weigh less and take up far less space than wet.

5. Tent: This is likely to be your most bulky and heavy item and packing it here against your back and just over your hips makes it easier to carry. If you have a good tent you may fit the whole thing in here but if you don’t you may have to get inventive with the packing such as putting the poles and pegs in the side pockets. The room this is going to take up really is down to the tent you have as an individual (or couple or group). If you haven’t got yourself a tent and the tent is just for you a sensible option if you can’t afford lighter and / or more packable tent is to go for a one person tent. That may just sound like an obvious comment however more than often a one person tent is super cramped and like sleeping in a nylon coffin, personally I use as two man MSR tent because I like to be able to easily move around my tent, store all my gear in there with me and sit up and read a book. Packed properly I can get my tent pretty small and I’d rather carry slightly more weight and get a better night’s sleep where I’m not rolling over and a getting a face full of nylon. A really important point here as well is the lighter weight tents barely have much of a weight difference between a one man and two man.
6: Get your sleeping bag, sleeping mat and pillow in here: kit choice matters here depending on your budget and activity. I don’t scrimp here and as I’ve already said don’t mind carrying a bit more weight if it means a better night’s sleep, because adventures are much more enjoyable when you are well rested.
A Tip On Sleeping Mats: Though sleeping mats made of just foam are usually (but not always) a great cheap option and are very light, not only can you not make them much smaller so they end up in the hood of your bag or strapped to the outside but they are also not very comfortable and not very warm either. Inflatable sleeping mats do tend to be considerably more expensive however they are very packable, much more comfortable, warmer and warmer. How packable, warm and comfortable the one you get it however really does depend on your budget. Brands like Vango make affordable sleeping mats such as the Vango Trek Pro 3 and on the higher end Therm-a-rest ‘pads’ make excellent sleeping mats. I’m currently using the Therm-a-rest Evolite that I’m not even sure they make anymore but just goes to show they last!
Try To Avoid The Cheapest Sleeping Bags: Just to be clear I’m not saying hiking is only for those who can afford pricey gear. Those who are quick to point fingers about alleged gear snobbery also tend to be the sort of people who take equipment that’s wrong for the job and get themselves in trouble. It doesn’t have to be the most expensive gear it needs to be the right gear and sometimes the right gear costs what it is worth, and what it is worth is being more comfortable and not dying from exposure which is always a bonus I’m sure you will agree. Cheap sleeping bags do have a use and it’s usually campsites rather than carrying around that’s why they tend to be huge. I’m not saying you can’t use these because everyone has a budget however you need to consider if you other gear is actually going to fit in the bag after you get that Aldi special the size of a real ale cask in there. If you are a DofE participant a cheap sleeping bag can take up most of your rucksack and leave hardly any room for anything else. The reason why cheaper sleeping bags are huge is that they rely on more material instead of better fabrics / fillings for warmth, which means more weight and less packability. . It’s not a hard and fast rule but a lot of synthetic bags tend to not compress down as well as a down sleeping bag for example and they both have their own pro’s and con’s, and that is a big subject best left for the Guest post from Bracken Outdoors on sleeping bags which may give some insight into what you need https://requiemfortheextreme.com/2022/11/23/guest-post-all-about-sleeping-bags-a-buyers-guide/
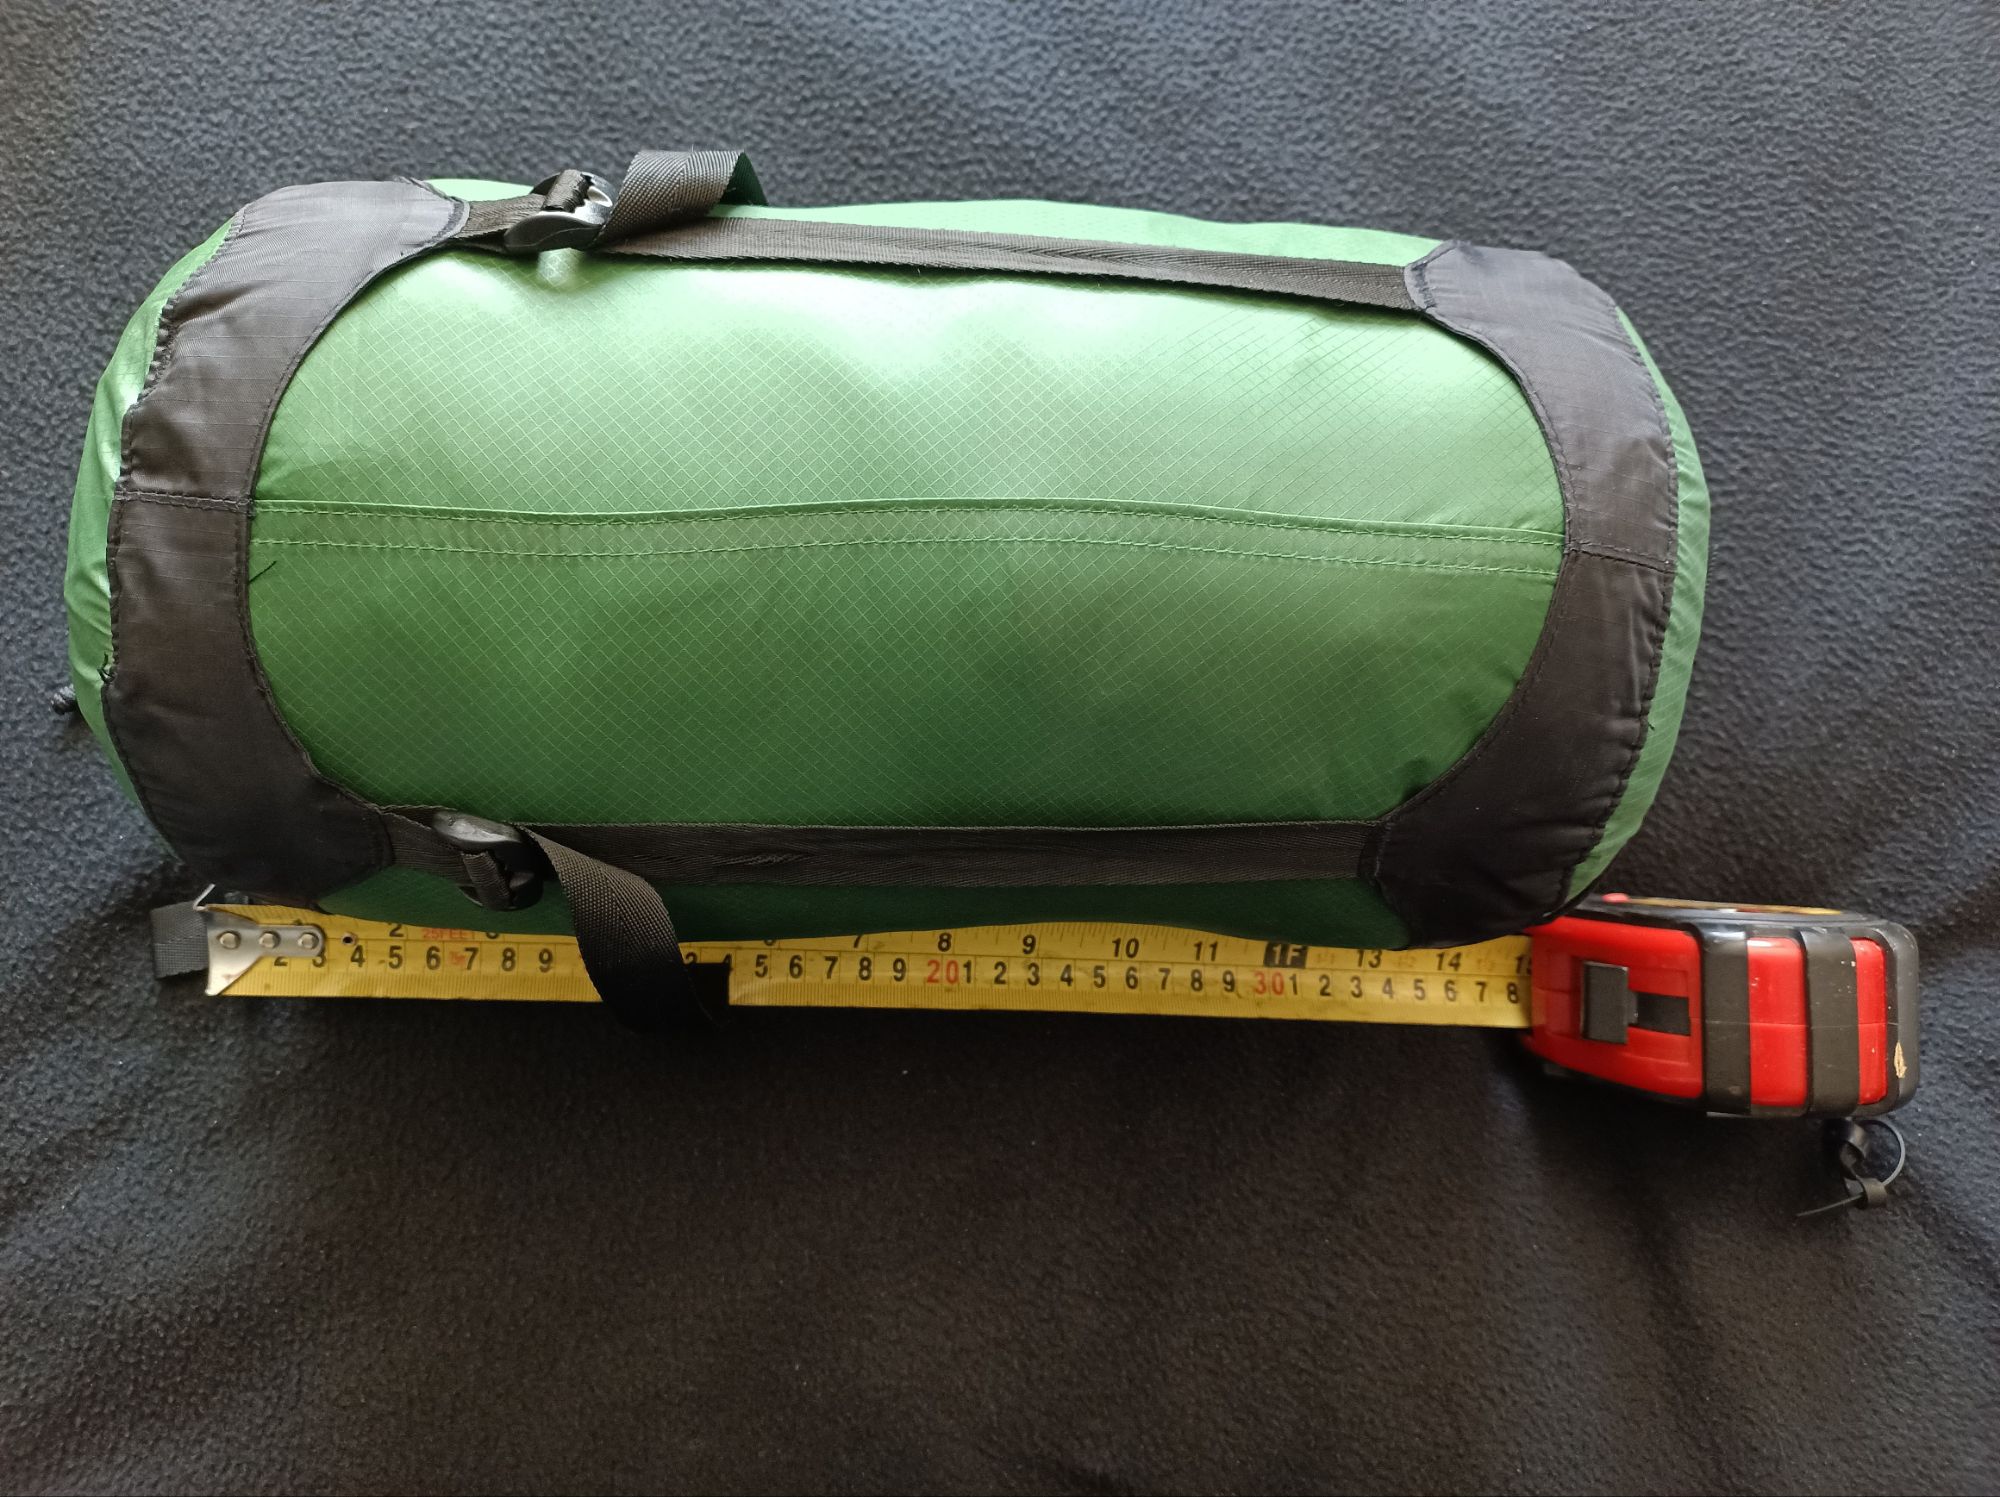
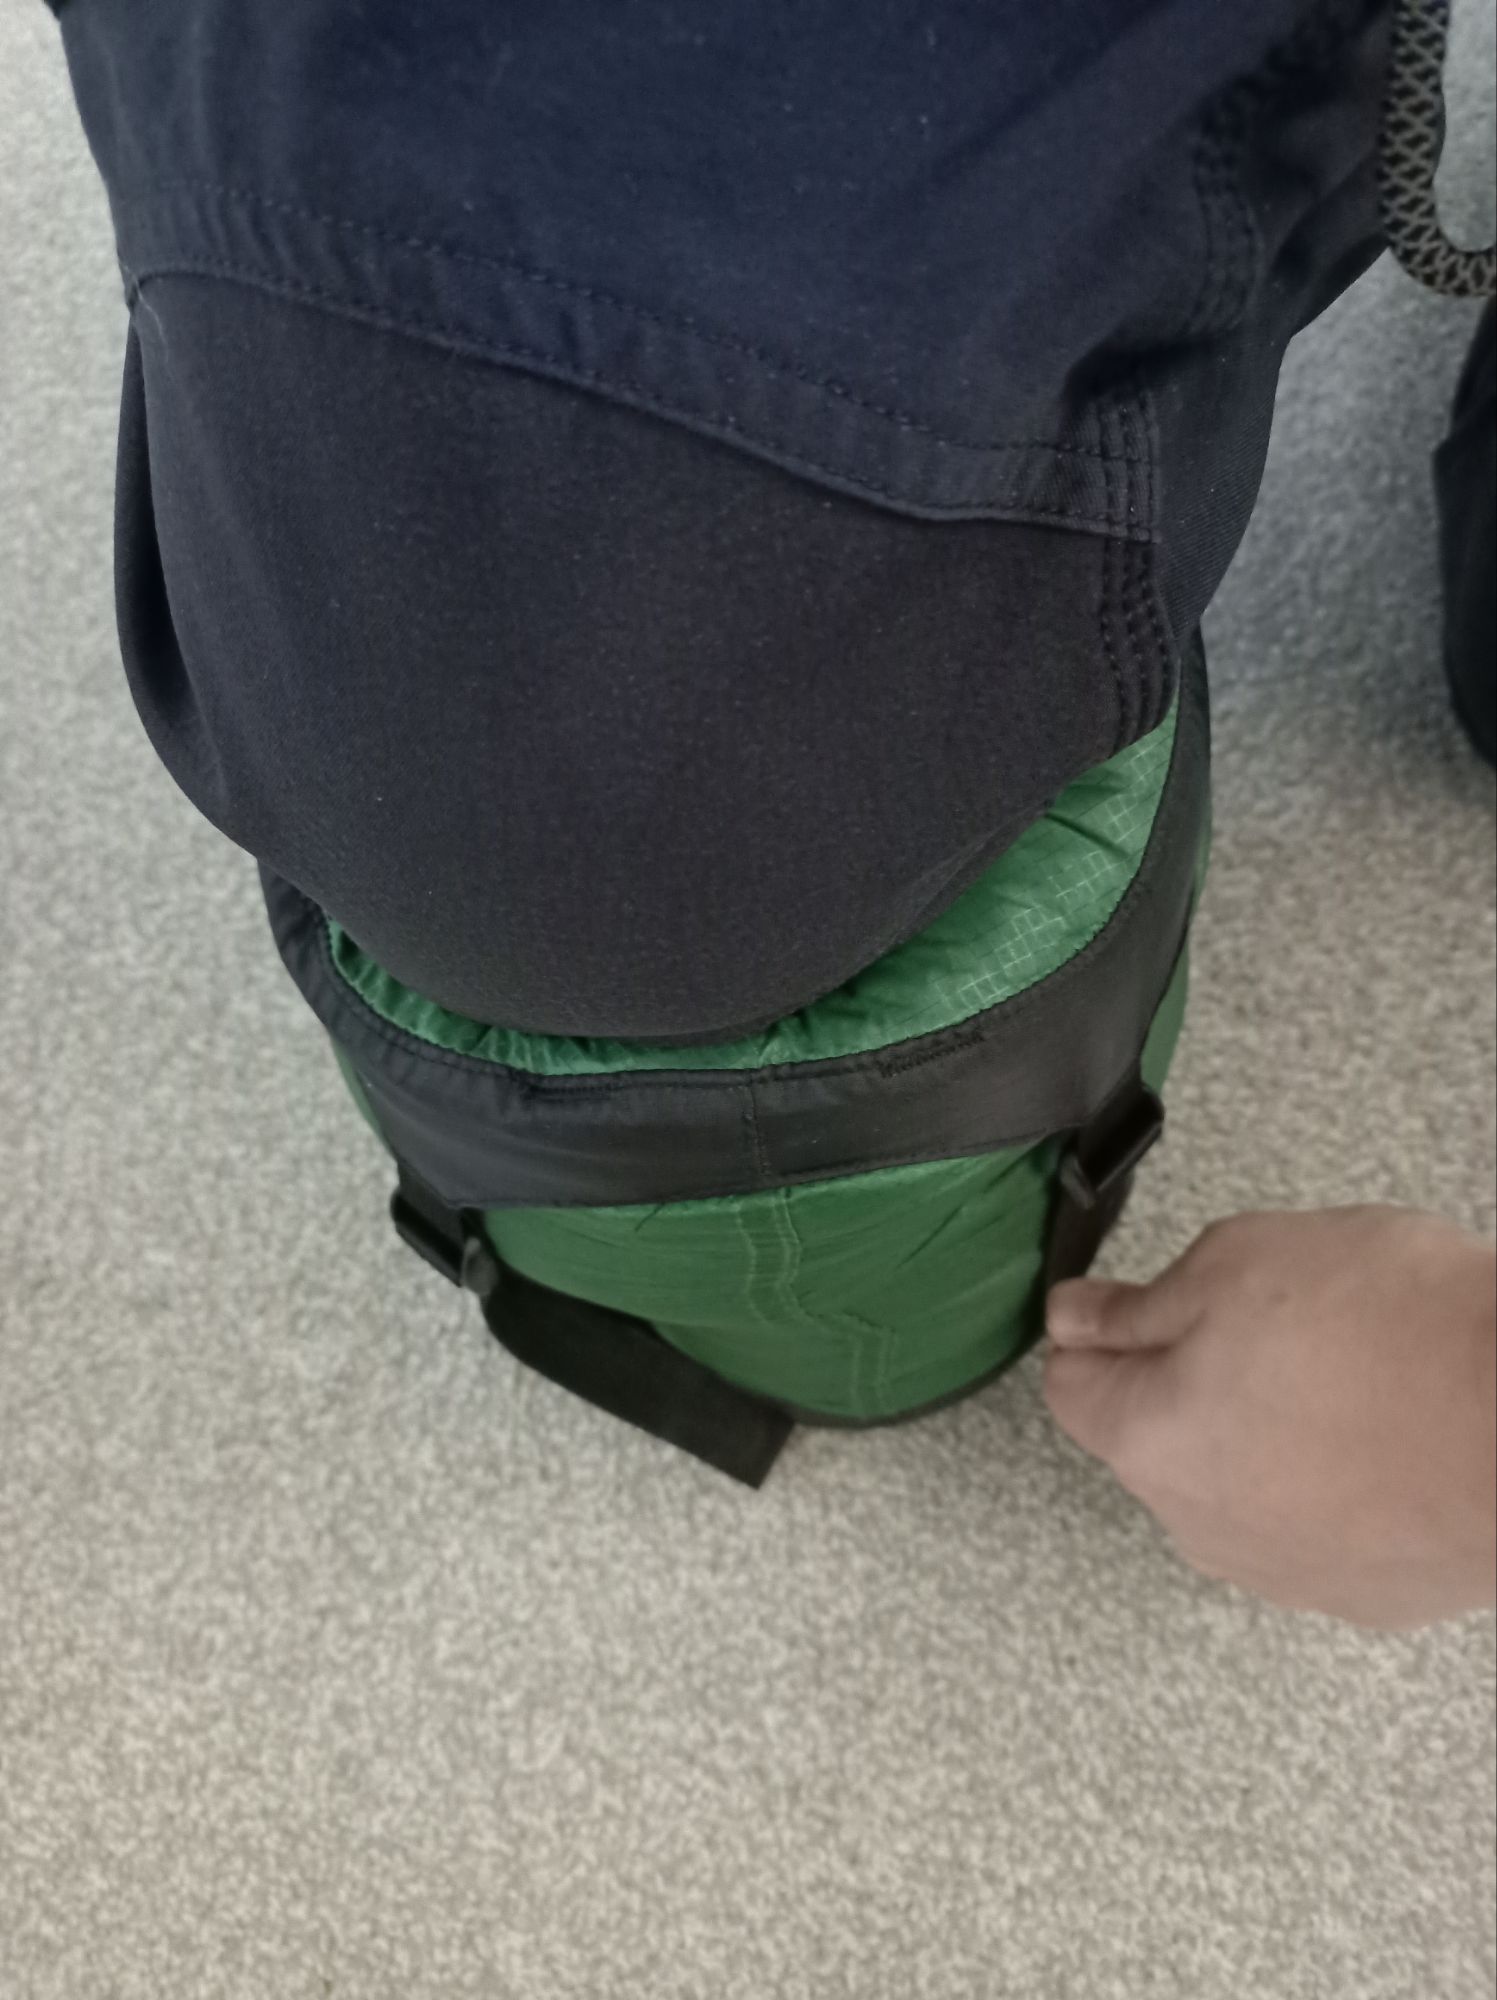
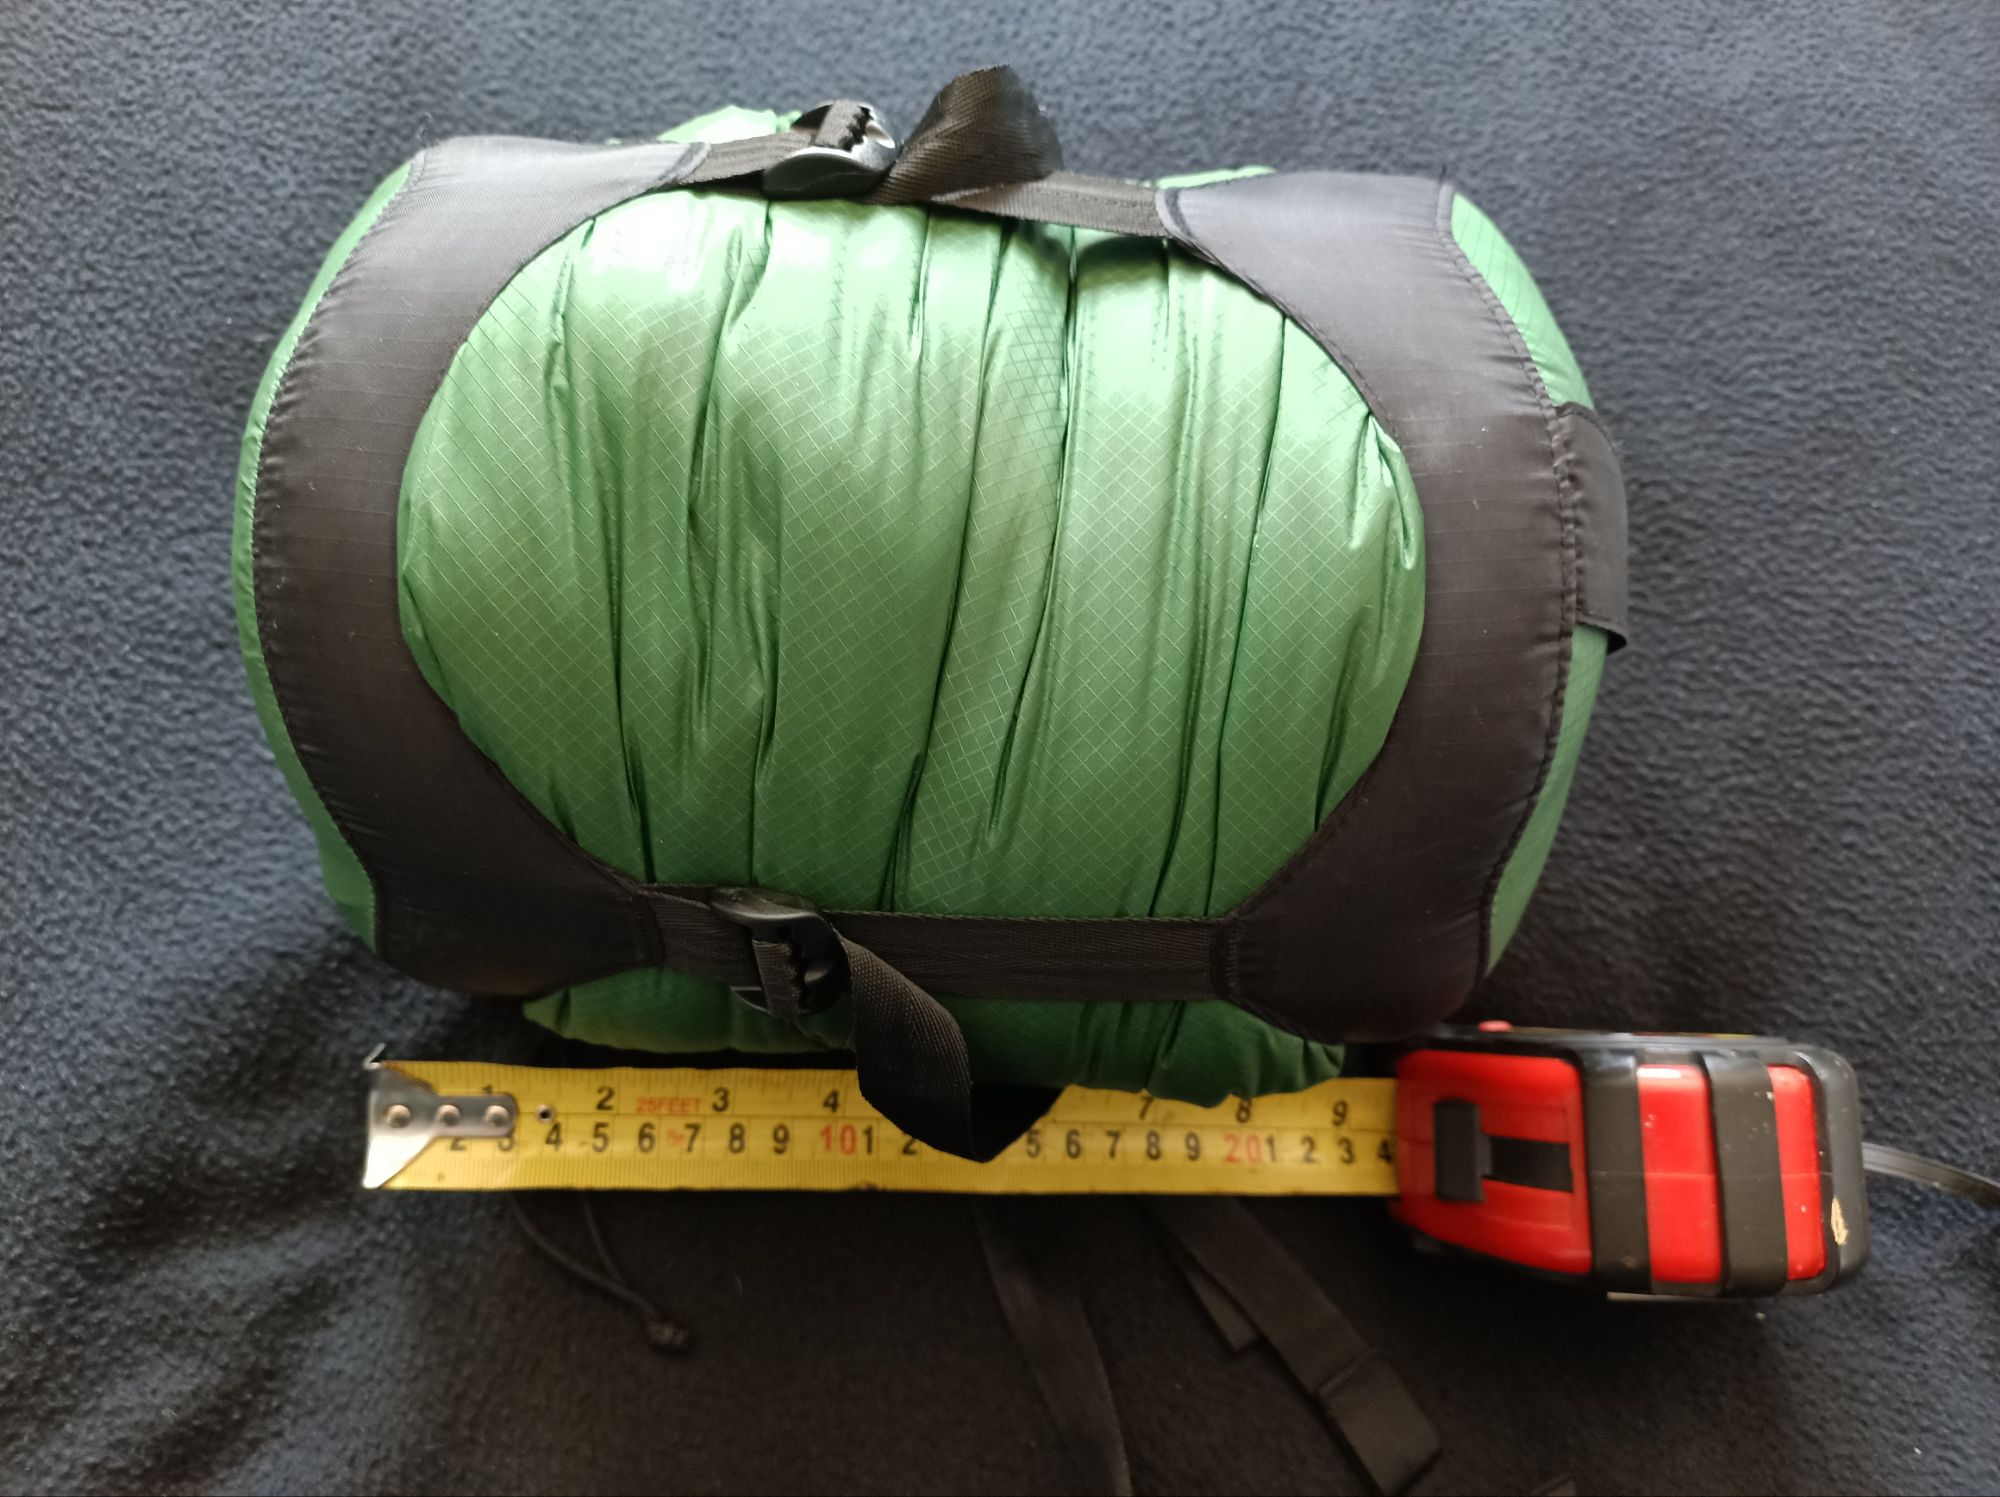
Sleeping Bag Compression: If you can’t afford a more packable sleeping bag look at decent compression sacks – the one your bag came with likely is not very good. I highly recommend the Sea To Summit Compression sacks here, it’s a personal preference however. See how this takes my sleeping bag down from about 38cm to just 24cm. That’s a huge space saving – the bag is a Rab Ignition 2 – a two season bag. When not in use however don’t store your bag at home in its compressed state. Storing like this for long periods makes it harder to get the down to loft if you bag is down filled and can have a similar effect on synthetic fibres.
Sleeping Bag Liners
For warmth sleeping bag liners can be your friend in this case I’m using a Sea To Summit Reactor Extreme which means I can effectively make my two season bag a three season when needed or if it suddenly goes warm use the liner just by itself as a sheet. Additionally on multi day trips its far easier washing a liner that’s keeping your sleeping bag clean than it is to wash and dry a whole sleeping bag in the field which is practically impossible in the UK most of the year. You can see my review on the excellent Sea To Summit Thermalite Reactor via this link: STS Thermalite Reactor Extreme Liner Review
Consider The Weather
Checking the weather forecast really helps or if you are travelling looking into the climate where you are. Many seem to make the mistake of thinking local weather is the forecast – if you are in the mountains in the UK you need to check the mountain weather – try https://www.mwis.org.uk/ Weather at different altitudes and mountains will be considerably different than in the towns and this should be informing your kit choices. Knowing if it’s going to be warm or not could be the difference between taking a larger three season instead of a two season, packing more layer than you need or even carrying way too much water. If you are travelling especially outside of the UK , it can inform clothing choices and potentially save you space or even mean you have less of it to play with.


7: Immediately Accessible Items : This really depends a lot on your rucksack design and in this case we have a rear mesh pocket, two side pockets, two hip pockets and even a strap pocket.
Most rucksacks have the hip pockets (bottom left) I use these for snacks so I don’t have to stop and maybe my mobile phone. The side pockets can be used for water bottles, tent poles or pegs or if you are old school enough even a liquid fuel bottle. The rear mesh panel (centre) is ideal for a map and a compass if not in use and keep the compass away from any electronics that may have magnets in them.
Water Considerations: It’s worth thinking about if you need to take lots of water with you or not, being one of the heaviest things you can trek out with. The weather will have an impact on this, if it’s hot you will need more water for example, however if you are in an area with water sources you can take a water filter and/or water sterilisation tablets instead and save yourself space and pack weight. Personally I have a hydration pack for hands free and no stopping on the trail and I keep a single water bottle to use in my tent.
8: Spare clothes in a dry bag. Packed last as usually just need to be accessed when your camp is set up, however in some rucksacks now you will have a handy access bit in the bottom. I usually have another two dry bags in here for socks and underwear and a spare ‘dirty laundry’ bag. If you are backpacking or travelling putting a small tube of biodegradable outdoor detergent and a travel clothes line in here is an option. Based on experience I’m going to get completely drenched in a sudden shower before I can get my waterproofs on at least once on a week long hike and if it’s Scotland maybe twice. So I’ll take extra socks and pants and spare clothes if I have space for that but try my best not to pack like as I’ve heard it so well put somewhere ‘like you are expecting to shit yourself every day’
Do You Really Need So Many Socks? I carry an extra pair of socks if I’m out sometimes more if I’m on a longer expedition. You can just take a few pairs of socks and liner socks if the weather is drier and you are out for multiple days, changing the liner socks and re wearing socks. I’d only really recommend doing this with merino wool socks which are resistant to smell and bacteria build up. Brands like Bridgedale and Smartwool do some excellent socks I highly recommend.
Technical Hiking Clothing Saves Space: Lightweight hiking t shirts, trousers, insulated jackets and so on take up far less space than normal everyday clothes and are usually quick drying and often anti bacterially treated meaning you can wear them longer before they start to smell. Great examples of hiking trousers are the Montane Terra Pants which you can see my review of here: Montane Terra Pants and for hiking t shirts tops like the Mountain Equipment Ignis Tee which is treated in Polygiene anti-microbial technology.


If you enjoyed this blog, guide or review and don’t mind spending a further moment of your time to help us out please like, comment and subscribe below – it all helps keep the blog going and we love to hear your views on the content! Is there somewhere we should visit or something we should try? Are you a manufacturer who want’s us to take a look at your kit? Let us know!

Leave a comment